Emails
You need an email service to handle login links, abandoned cart notifications, and other automated emails. The following are instructions for Mailgun, AWS SES and Cloudflare (receiving only)
Setup - Sending Emails
-
Sign up at Mailgun
-
Go to Sending > Domains > Add New Domain
-
Copy the DNS records from the Mailgun instructions and add them to your DNS provider.
Type Name Value TXT email._domainkey.yourdomain.com k=rsa; p=lorem-ipsum TXT yourdomain.com v=spf1 include:mailgun.org ~all CNAME email.yourdomain.com eu.mailgun.org Type Name Value Priority MX yourdomain.com mxa.eu.mailgun.org 10 MX yourdomain.com mxb.eu.mailgun.org 10 Info
If you use a subdomain, make sure it's reflected in your DNS records, e.g.:
mail.yourdomain.cominstead ofyourdomain.com. Mailgun will show you the correct subdomain to use in the instructions. -
Add this DMARC record for better delivery:
Type Name Value TXT _dmarc.yourdomain.com v=DMARC1; p=none -
Get your SMTP credentials from Domain Overview > SMTP Credentials
-
Add the password to your
.env.prodfile (or.env.localfor local development): -
And change the following in your
settings.py:config/settings.pyEMAIL_HOST = 'smtp.mailgun.org' EMAIL_HOST_USER = '[email protected]' EMAIL_HOST_PASSWORD = config('EMAIL_HOST_PASSWORD', default='') DEFAULT_FROM_EMAIL = '[email protected]' NOREPLY_EMAIL = '[email protected]' EMAIL_PORT = '587'
-
Click on Get Started and enter an email address where you can receive emails (most likely not (yet) the domain you want to use for sending emails), click on Next
-
Enter the following and click Next:
yourdomain.comin Sending domainmail-from.yourdomain.comin MAIL FROM domain - optional, but recommended for better deliverability (this subdomain must not be used for anything else, neither sending nor receiving emails, this is why we chosemail-from.yourdomain.cominstead of e.g.mail.yourdomain.com)
-
Optional: Enable Virtual Deliverability Manager to get insights into your email deliverability
-
Review and click Get Started
-
Now check Open tasks, the most important ones are:
- Verify email address - click on the verification link in the email sent to the address you entered in step 2
- Verify sending domain - click on Get DNS Records and enter the records in your DNS provider
- Request production access - fill in the form and click on Submit request, the mail type is Transactional
Info
The
MXrecord of theMAIL FROM recordsis slightly strange formatted if you are using Cloudflare. The value field10 feedback-smtp.eu-west-1.amazonses.comis actuallyfeedback-smtp.eu-west-1.amazonses.comwith a priority of10. -
Click on SMTP Settings in the sidebar -> Create SMTP credentials -> Create User
-
Add the password to your
.env.prodfile (or.env.localfor local development): -
And change the following in your
settings.py:config/settings.pyEMAIL_HOST = 'email-smtp.[your-region].amazonaws.com' EMAIL_HOST_USER = 'AKIA[your-access-key-id]' EMAIL_HOST_PASSWORD = config('EMAIL_HOST_PASSWORD', default='') DEFAULT_FROM_EMAIL = '[email protected]' NOREPLY_EMAIL = '[email protected]' EMAIL_PORT = '587'
Tip
Verify your DNS records at MxToolbox
Setup - Receiving Emails
-
Go to Receiving -> Create Route
-
Set Expression Type to
Catch All -
Toggle Forward and enter your personal email address
-
Click Save
-
Test by sending an email to your new address
AWS SES does not support forwarding emails to a personal email address, you would need to set up a lambda function, etc.
This is why I recommend using Cloudflare's Email Routing to forward emails to your personal email address.
-
Go to your Domain in Cloudflare
-
Go to Email -> Email Routing -> Get Started and follow the instructions
-
After setting up, you can create a catch all rule to forward all emails to your personal email address.
Routing Rules -> Catch-all address -> Edit:- Action = Send to an email
- Destination = your personal email address
-
Then toggle the status of the Catch-all rule to Active
Extra: Setup - Sending Emails via Gmail
In the first Setup - Sending Emails we set up sending emails via Mailgun. These emails will be sent in your Django app automation. However, you might want to respond to emails from your users directly - without having to use the API.
You can do this by integrating Gmail with the provider you set up above.
- Go to Gmail -> Settings gear ⚙️ -> See all settings
- Go to the Accounts and Import tab and click on Add another email address
-
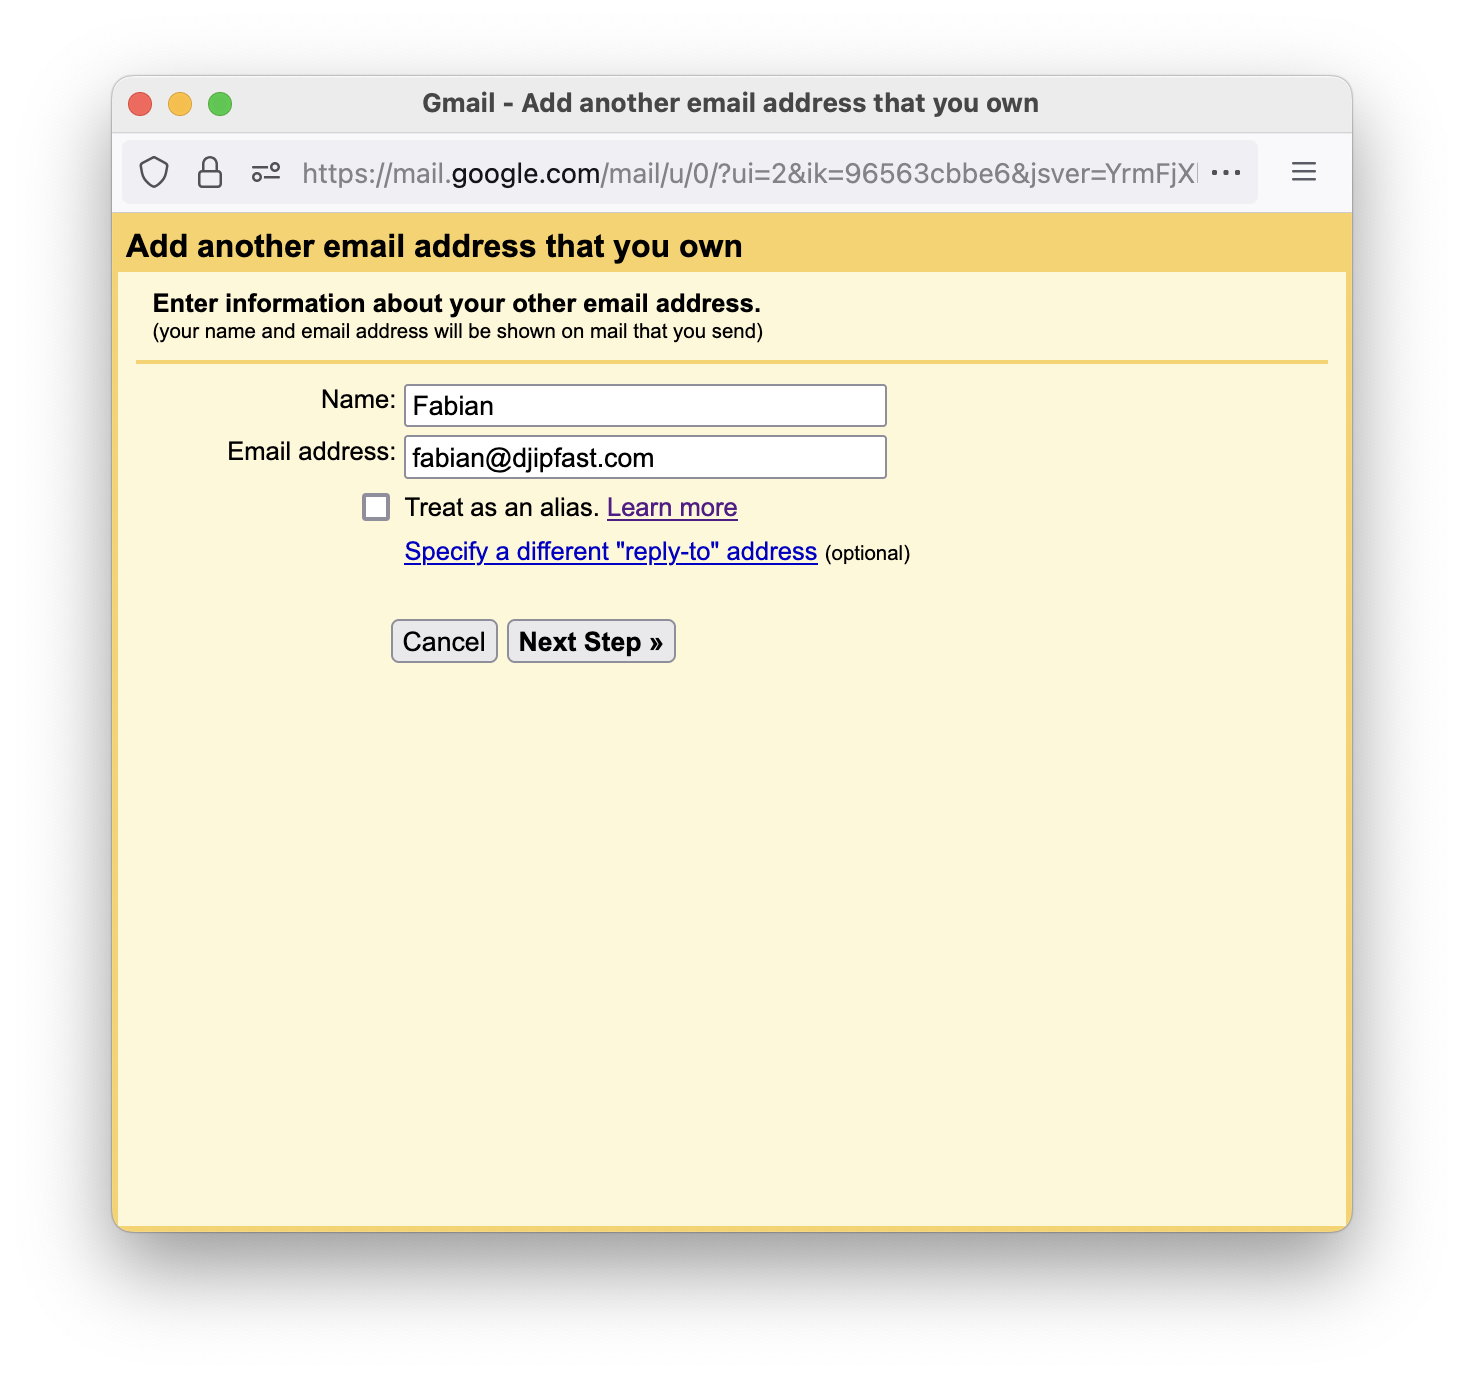
A pop-up will appear, enter the name and email address from which you want to send emails, uncheck Treat as an alias and click on Next step.
-
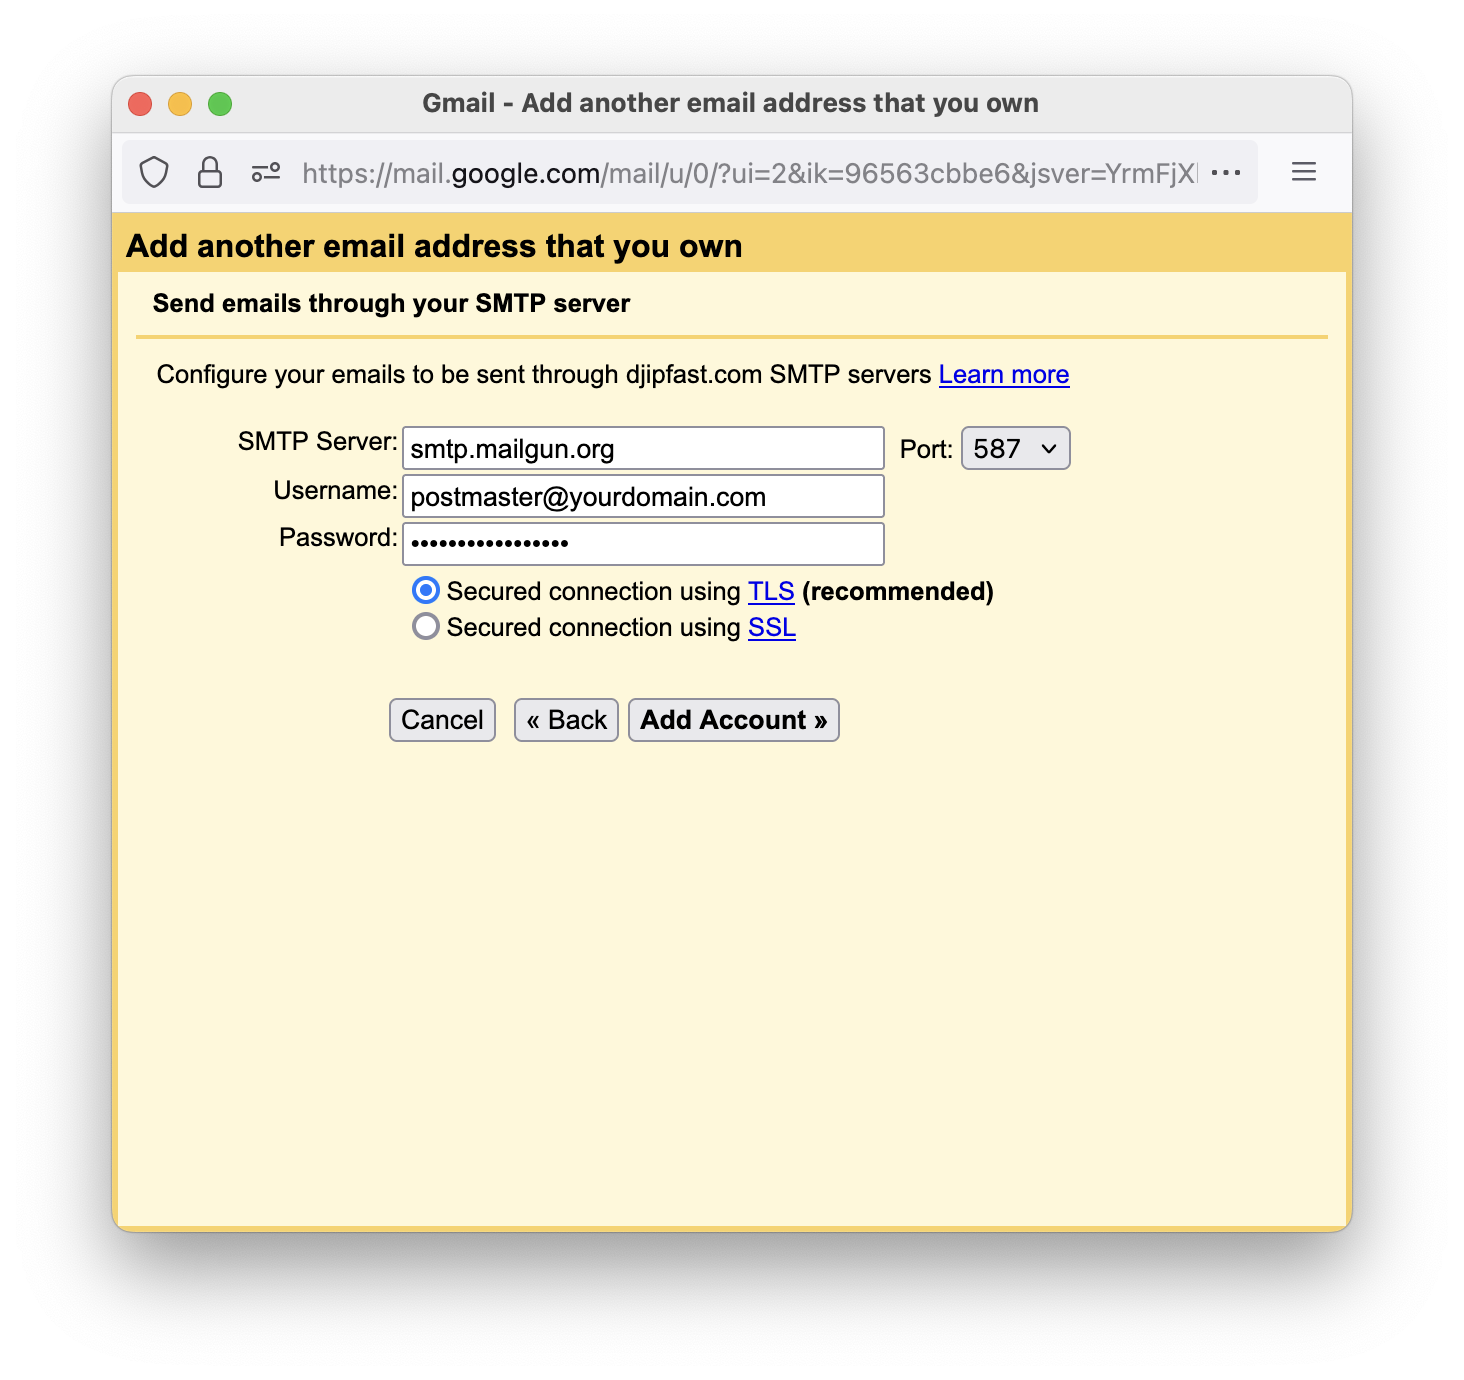
Enter your SMTP credentials from Setup - Sending Emails (
EMAIL_HOST,EMAIL_HOST_USER,EMAIL_HOST_PASSWORD) and click on Add account. -
A verification email will be sent to the address you entered, click on the link to verify your address.
-
You are now ready to send emails via Gmail, you can select the email address you want to send from by clicking on the From mail address in the New message window in Gmail.
Avoiding landing in the spam folder
✅ Configure DNS records:
- SPF record
- DKIM record
- DMARC record
✅ Email content best practices:
- Include unsubscribe link
- Use recipient's name
- Keep formatting simple
- Link only to trusted sites
❌ What to avoid:
- Marketing terms like "free" or "earn money"
- Unusual fonts or layouts
- Excessive punctuation
- Links to suspicious sites
Development
While developing you may want to skip sending emails and just log them. Do this by setting EMAIL_BACKEND in your settings.py file to the following:
The mail sending will be skipped, instead the emails will be displayed in the console.

